The pedagogy of making: Pinhole camera


Inviting students to make simple models of scientific instruments from scratch has many advantages. Constructing and analysing how these models work gives students opportunities to engage with thinking like a scientist. Using inexpensive, local, and easily available materials strengthens their creativity, and the ability to improvise and learn from failures. Understanding the role of different components and changing different variables deepens students’ engagement with related concepts.
These making experiences can also help students develop important science skills, such as manipulating a model to explore its properties, observing cause-and-effect relationships, and identifying the limitations of their inferences. Students retain the knowledge and skills gained from such experiences for longer. Regular opportunities can help students become independent learners.
To encourage such experiences in the classroom, middle-school science textbooks include step-by-step procedures for constructing instruments and models that support understanding of related curricular concepts. Often, teachers expect their students to read, understand, and follow these procedures independently and as closely as possible. While students may develop some technical proficiency and conceptual understanding through this process, they also need the opportunity to use and develop their creative and critical thinking skills. To use this pedagogy most effectively in the classroom, teachers need to:
- Encourage students to modify the procedures shared in the textbook to match the materials and time available to them.
- Allow students to operate their models to understand their working principles.
- Ask students probing questions about their observations to lead them towards new areas of inquiry.
Some textbook procedures can be quite complex, involving many steps and precautions. In such cases, students may depend on their teachers for step-by-step guidance. Even if they try to follow the procedure independently, it can take so much time, energy, and attention that students may be unable to focus on manipulating the different components and variables of the model. A creative science teacher can address this challenge and bring students’ focus back to the learning objectives by simplifying the procedure. One example can be seen in the procedure for constructing a pinhole camera included in the Grade VI curriculum (see Box 1).
Box 1. Pinhole cameras in the Grade VI curriculum:
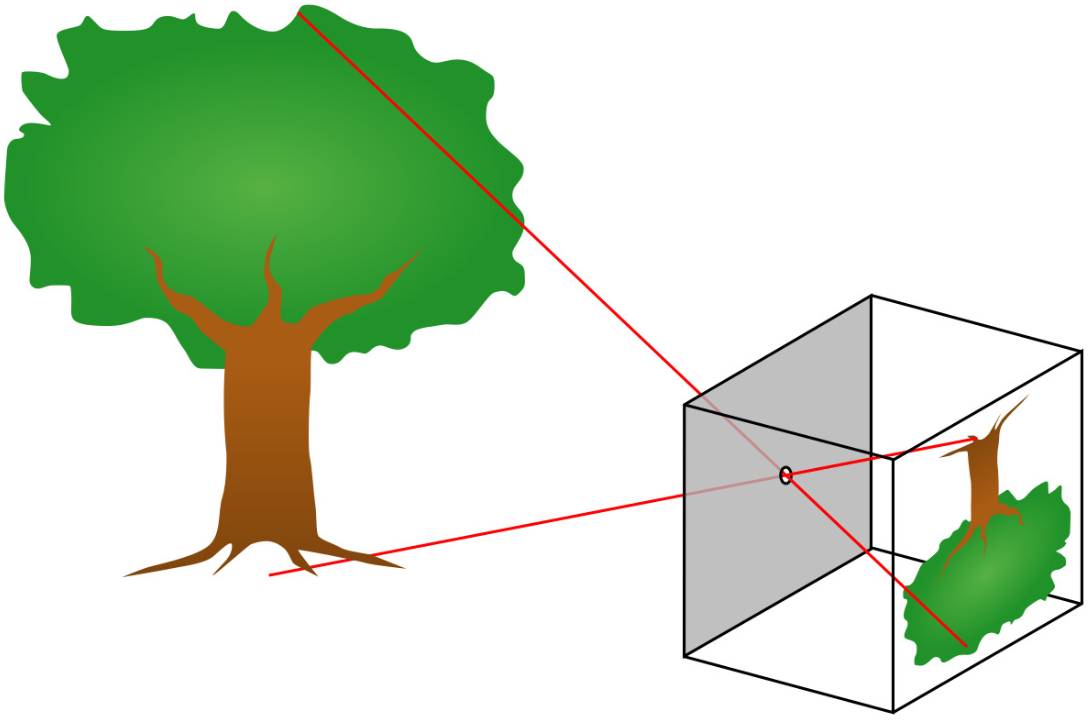
A pinhole camera is an optical instrument that forms an image without a mirror or a lens. In its most common form, it consists of a light-proof hollow box with a tiny aperture (pinhole) on one side and a translucent screen on the opposite side. When students point the camera toward an illuminated object, they see a real but inverted image projected on the screen (see Fig. 1).1
The construction of a pinhole camera is included in Chapter 8 (‘Light, Shadows, and Reflections’) of the Grade VI science textbook (NCERT, 2023-2024).2 This chapter describes how light travels in a straight line through a transparent medium. Called the rectilinear propagation of light, this property explains many real-world phenomena, such as eclipses and the formation of shadows. It now appears in Chapter 11 (‘Light’) of the Grade VII science textbook (NCERT, 2024-2025).3
While this property is often taught as a fact to be memorised, the National Curriculum Framework for School Education (NCF-SE) 2023 recommends that: “…simply stating the rectilinear propagation of light is insufficient… To extend the example of rectilinear propagation of light, students can observe this through the…simple manipulation of cardboard sheets with small holes in front of a candle, or using a pinhole camera/ periscope made in the classroom”.4,5 A related learning outcome for Grade VI science states: “The learner constructs models using materials from surroundings and explains their working, e.g., pinhole camera, periscope, electric torch, etc.”6
Making a pinhole camera
I invited Grade VI students of an upper primary government school at Uttarkashi to make and manipulate their own pinhole cameras (see Activity Sheet: Make your own Pinhole Camera). This was the pedagogical approach I used:
Step 1: I started by showing students a pinhole camera I had constructed using just a disposable paper cup and a piece of butter paper large enough to cover its open end. I had pierced the closed end of the cup with a pin to allow light from an illuminated object to enter. The butter paper acted as a screen on which the image was projected.
I encouraged students to handle the camera and identify the materials used to construct it. After they had identified the materials they could see, I lit a candle, pointed the pinhole end towards the flame, and asked students to observe the screen. They shared that they could see an inverted image of the candle flame. I then dismantled the camera and showed students each of its parts. The main objective of this exercise was for students to understand that any opaque surface with a pinhole can be used to form an image and that any translucent surface can serve as a screen.
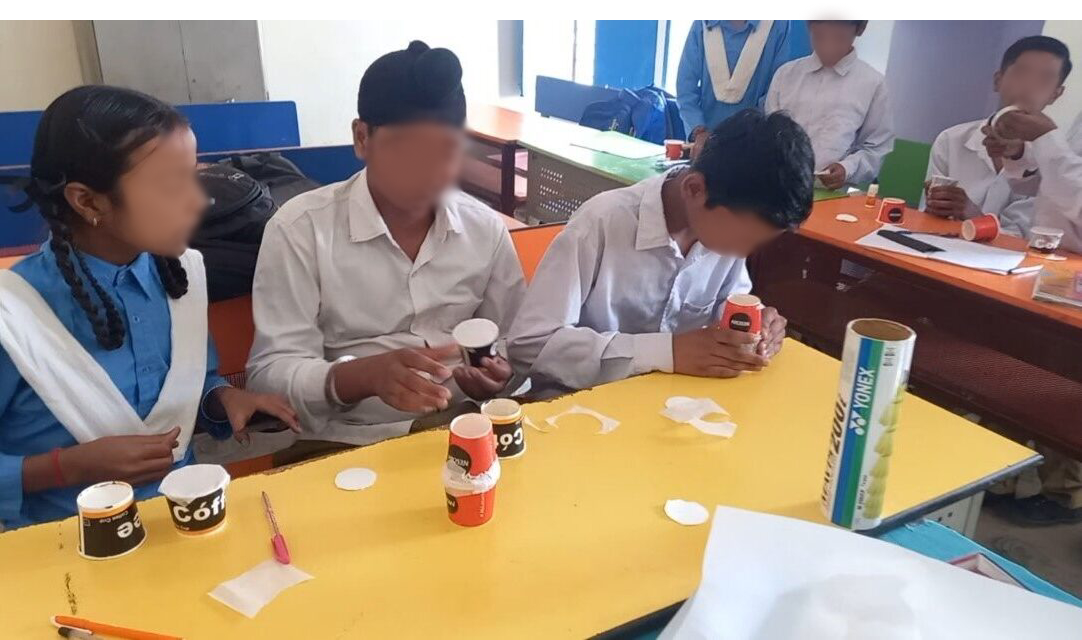
Step 2: When students expressed interest in constructing their own cameras, I invited them to collect materials from a box kept on my table. This included paper cups, cutters, pieces of butter paper, glue, and tape. As students returned to their tables to assemble the models, I walked around the class observing their work.
Many students found it difficult to attach the butter paper to the cup without wrinkling or tearing it. In such cases, I encouraged them to ask a friend for help. At first, students used rubber bands to secure the paper, but we found that the screen wrinkled with repeated use. So I suggested using glue instead. After all students had constructed their cameras, I invited them to check if their models worked. I lit a candle on my table and students brought their cameras over to see the images formed on their screens.
Encouraging deeper inquiry and discussion
One of the first student cameras to be tested produced a blurred image. Without any prompting, the student who constructed it began to adjust the distance of their camera from the candle—moving it closer and then farther away. Through these minor adjustments, they found the distance at which the image was brightest and clearest. Another student observed that changing the distance between the camera and the flame changed the size of the image too. The other students then tried this themselves. They concluded that the closer the aperture of the camera is to an illuminated object, the larger and brighter the image on the screen.
Some students struggled more than others to get a clear image of the flame. I asked these students to compare their cameras with those of their classmates: Could they see any clear differences in construction? We observed a difference in the size of the pinhole. Some students had pierced the bottom of their cups with the tip of a ballpoint pen rather than a needle. This led them to conclude that the smaller the hole, the sharper the image. My next question was: What would I see on the screen of my camera if I made a smaller second hole (with a pin) near the larger first one (with the tip of a ballpoint pen)? Some students tested this idea and were surprised to see two inverted images of the flame. This triggered the curiosity of other students, who immediately poked multiple holes in the bottom of their own cups. They eagerly compared the patterns and orientations of the multiple images produced.
To bring students’ attention back to the clarity of their images, I asked if it would change by darkening the room. Since they were not sure, I encouraged them to test it. When we closed the windows and switched off the one light bulb in the classroom, the images became much clearer. When I asked why this happened, some students suggested that darkening the room ensured that most of the light entering the camera came from the flame. I pointed out that we had already ensured this by blackening the bottom and the sides of the cup. After some discussion, students concluded that the less ambient light the screen is exposed to, the clearer the image appears.
I asked students if we could modify the design of the camera to reduce the amount of ambient light that the screen is exposed to. One student suggested blackening the screen. I agreed that this would block the ambient light, but asked how it would affect the image of the flame. Seeing that students did not know how to respond, I asked whether they could tell me why we were using butter paper for the screen. Could the screen be made from other materials too? When no one responded, I asked students to suggest inexpensive and easily available materials. As students shared suggestions, I listed them on the board: oiled paper, plain white paper, cloth, and polythene. I added blackened paper to the list and invited the class to try each alternative. Working in groups, students constructed five different models. On testing them, they discovered that images were visible on screens made of white butter paper and oil paper, but not on those made of polythene, white paper, or blackened oil paper. When I asked students to explain this, they suggested that an opaque screen (like white or blackened paper) blocked light from reaching our eyes. In contrast, a transparent screen (like polythene) allowed most of the light to pass through, so no image could be seen on the screen.
I brought the discussion back to the question we started with: Could we modify the design of the camera to reduce the light from the environment that the screen is exposed to? A student suggested covering the screen with something like a paper shield. Others pointed out that this would obstruct our view of the image. Another student rolled a strip of black chart paper into a hollow pipe and asked if we could look through it. A third student backed the idea of a paper wall with one change: cutting out a small window through which we could view the screen. We decided to combine both ideas. We blackened the outer surface of a second paper cup and cut a small viewing hole in its base. The mouth of this cup was taped to that of the pinhole camera (see Fig. 2). When students tested this new model, the image produced in an undarkened room was as clear as the image produced by the older model in a darkened room. At the end of the session, I encouraged students to take their cameras home to view other illuminated objects, like trees, animals, people, and the Moon.
Parting thoughts
Making experiences offer students the opportunity to learn science by doing it. For example, teachers can connect student observations and experiences of making a pinhole camera with textbook concepts such as the rectilinear propagation of light, the classification of objects (transparent, translucent, and opaque) based on how much light they transmit, image formation by different types of cameras, and the properties of these images. However, to achieve this, it is not enough to ask students to mechanically follow complicated procedures from the school textbooks. Instead, teachers need to use their creativity to design simpler models, preferably with fewer and less expensive materials that students can dismantle and reassemble independently without needing constant guidance. Teachers also play a key role in asking questions that encourage students to experiment with the materials, construction, and working of these models. This gives students the chance to develop analytical, reasoning, and critical thinking skills. Such making experiences go beyond supporting the understanding of curricular concepts by helping students engage with the process of science through their creativity and curiosity.
Key takeaways

- Making simple models of scientific instruments allows students to engage with the scientific process, develop science skills, and retain knowledge of related concepts for longer.
- When textbook procedures for making models, like that of a pinhole camera, are complex and long, teachers need to simplify them by using procedures with fewer steps and more accessible and less expensive materials.
- Giving students the opportunity to take apart a working model, examine its components, build and test their own models, and modify different variables helps them develop analytical, reasoning, and critical thinking skills.
- It is also important for teachers to ask probing questions about the model’s working principles to encourage deeper inquiry, reflection, and discussion.
- Such making experiences go beyond supporting the understanding of curricular concepts by helping students engage with the process of science through their creativity and curiosity.
Notes
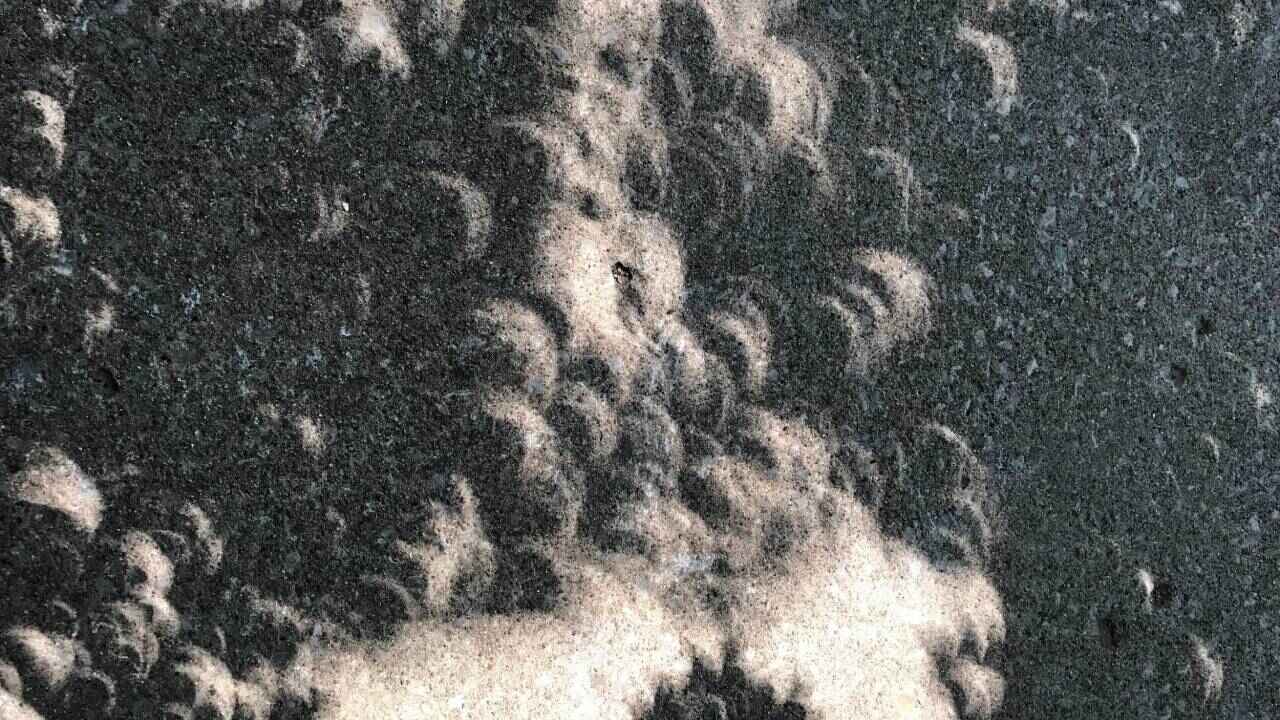
- Credits for the image used in the background of the article title: Pinhole Leaves, Shelly, Flickr. URL: https://www.flickr.com/photos/cat-sidh/36580062351/. License: CC BY-NC-SA 2.0 Generic Deed.
- Many designs of pinhole cameras can be used to project an image of the Sun or an eclipse that is safe to view. This is because their construction and use allow the viewer to keep their back to the Sun. However, the design described in this article would require the viewer to face the Sun and look at it through the pinhole camera. This can harm their eyes. It may be important to discuss this with your students and remind them to never look at the Sun directly or through any equipment that is not specifically designed for this purpose. It may also be important to underline the fact that sunglasses, binoculars, telescopes, and this design of the pinhole camera do not offer proper protection against the Sun. You could ask your students how they would modify the design described in this article to make it safe to view the Sun.
- This article includes one detachable classroom resource: Activity Sheet: Make your own Pinhole Camera.
References
- Khan Academy Labs. ‘What is a pinhole camera? | Virtual Cameras | Computer animation | Khan Academy’. YouTube. Uploaded on: Apr 13, 2019. URL: https://www.youtube.com/watch?v=jhBC39xZVnw.
- National Council of Educational Research and Training (2006, 2022). ‘Chapter 8: Light, Shadows and Reflections’. Science Textbook for Class VI (Rationalised 2023-24): 86-94. URL: https://ncert.nic.in/textbook.php?fesc1=8-16.
- National Council of Educational Research and Training (2007, 2022). ‘Chapter 11: Light’. Science Textbook for Class VII (Reprint 2024-25): 123-141. URL: https://ncert.nic.in/textbook.php?gesc1=11-13.
- National Steering Committee for National Curriculum Frameworks. ‘National Curriculum Framework for School Education 2023’. National Council of Educational Research and Training. URL: https://ncert.nic.in/pdf/NCFSE-2023-August_2023.pdf.
- ThinkTac. ‘Light – Rectilinear Propagation | ThinkTac’. YouTube. Uploaded on Dec 30, 2020. URL: https://www.youtube.com/watch?v=3VlPtST5-HA.
- National Council of Educational Research and Training. ‘Learning Outcomes at the Elementary Stage’. First Edition. April 2017. National Council of Educational Research and Training, Sri Aurobindo Marg, New Delhi. ISBN 978-93-5007-785-6. URL: https://ncert.nic.in/pdf/publication/otherpublications/tilops101.pdf.